Emails accounts are one of the most important things for businesses as they are the primary form of communication for generating and managing leads as well as communicating with staff or co-workers. Your email accounts can take a lot of time to set up, but we will show you how to easily get them set up in cPanel.

Step #1 – Log into cPanel
The first step is logging into cPanel. If you’re not sure how to login to cPanel, make sure you read this post about accessing cPanel. The main things you’ll need are your username, password and the correct login url.
Step #2 – Find the Email Accounts Section
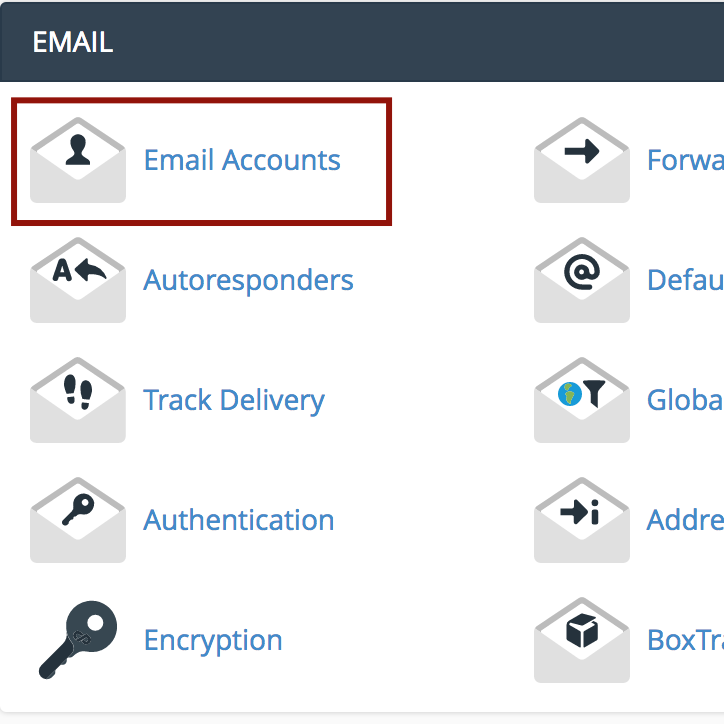 Once you’ve logged into cPanel, you will need to find the email accounts section. The easiest way to find it is to use the search feature near the top of cPanel or you can use CTRL+F on Windows (CMD+F on Macintosh). Search for “Email Accounts” and this should take you right to it; we’ve added an image to the post to highlight where it is and what it looks like. When you’ve found it, just click on it and this should take you to a new page.
Step #3 – Adding a New Email Account
So, it’s time to add your new email account, which is quite easy to do. Just take your time and follow the instructions on your screen.
Firstly, you will need to fill in most of the fields. Your first field, labelled “Email”, is the start of your email address i.e. info@, mail@ or even whatever your name@.
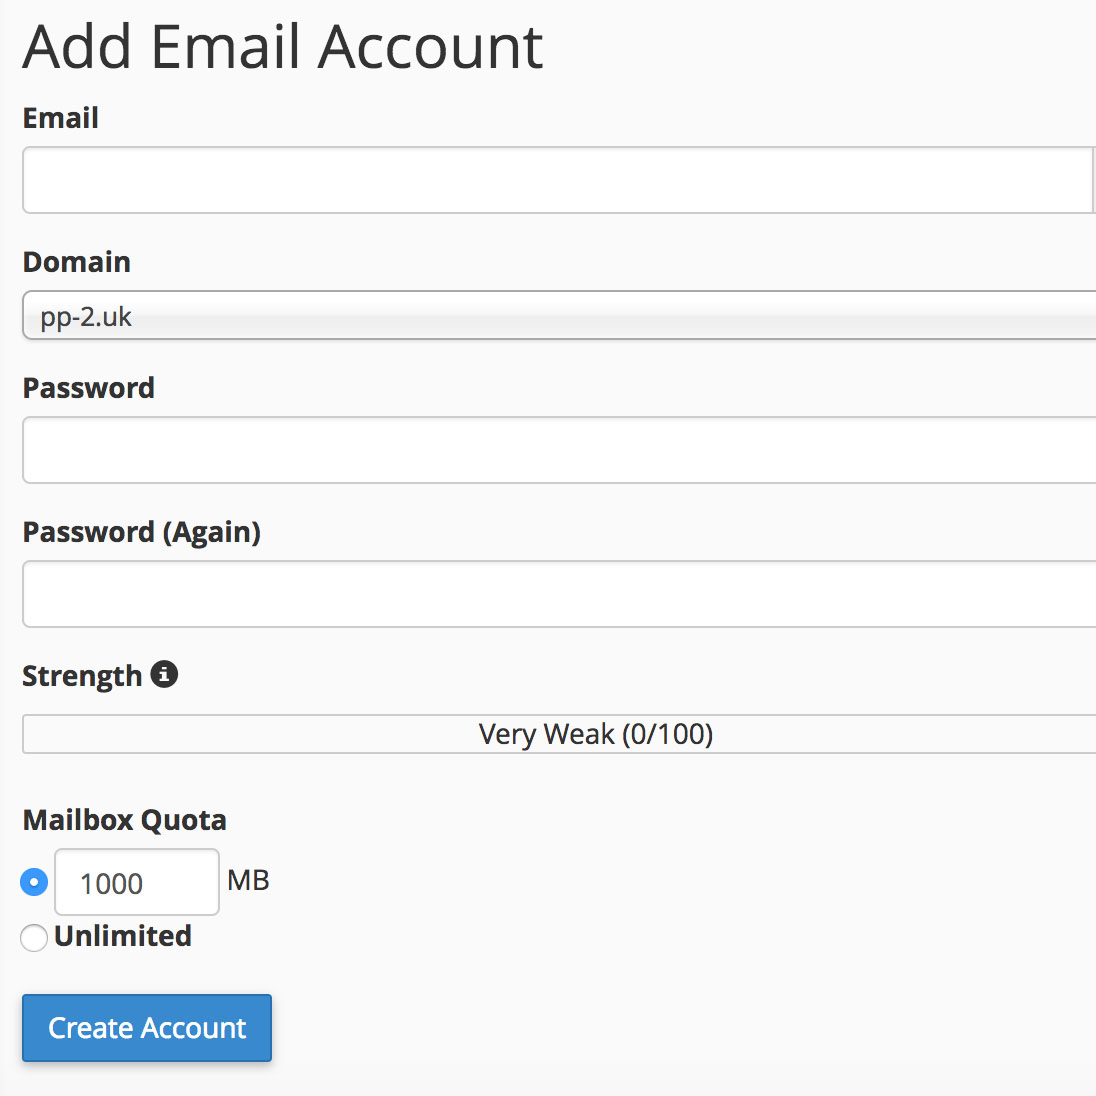 Secondly, you will need to select the domain that you wish to use for your email address. We would advise using the same domain as your website, so it’s easier for your customers or users to remember. For example, our website is on peakplex.com, so all of our address end with peakplex.com as well.
Next, you will need to type in your password for the email account. You should use strong passwords, so your password will need to pass the password strength test before the password can be set. If you want a strong password quickly, use the provided “Password Generator” button. Also, you will need to type the password twice to confirm your chosen password.
Finally, you will need to determine your mailbox quota. If you’re not sure what this is, please leave it as the default. Your mailbox quota is how much storage each of your email accounts have, which can be set to infinite by selecting “Unlimited”. You could end up using more disk space than expected, if you choose to use an unlimited quota, so we would recommend to always have a limit.
Step #4 – Confirm Your Settings
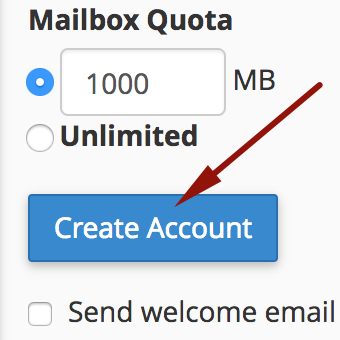 The last step is to look over all your fields and make sure they are filled in correctly. This will help you avoid setting them up twice, if you do make a mistake! If you’re happy, then click on the blue “Create Account” button and that’s you done.
Conclusion
Hopefully you have found this post helpful for creating new email accounts in cPanel. You can find other posts that go into detail about setting up your new email accounts in email programs like Gmail and Outlook. If you’re not sure how to do this, you could always access your emails via Webmail by using your email address and your password associated with it.
So, now you know how to access your cPanel account. If you have any questions or problems, you can ask our support team who are ready to help you.